Are you a trade contractor using AutoCAD, Civil 3D, or any other AutoCAD based software to create you BIM coordination models? If so, did you know you can link the Navisworks NWD or NWC models directly into your model? Let’s take a look:
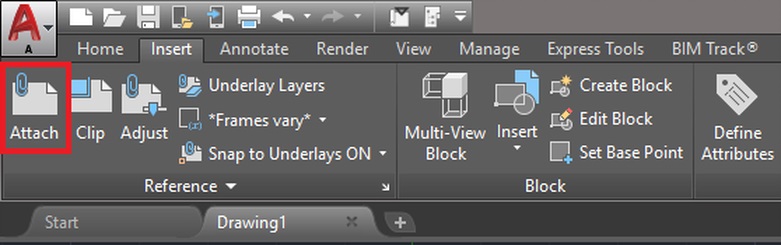
Open your AutoCAD based file and click on the “Insert” tab, and then click “Attach”

Now select the “Files of Type” drop down menu and change it to “Navisworks files”, and then navigate to the coordination model of your choosing, and click open.

Assuming you have created a model and aligned it with the rest of the team without moving it in Navisworks, the next step should work just fine.
In the “Attach Coordination Model” dialog box, make sure the “Specify on-screen” box is NOT checked for the “Insertion point”, “Scale”, and “Rotation”. We want to be certain that we do not manipulate the model in any way when bringing it in to our AutoCAD environment. Click OK.

After the model is imported, you may notice something odd with the model. It’s really dim and hard to tell what you’re looking at. Some may even deem this unusable. Did you know there are two commands that you can type into the command prompt that will allow you to adjust the display of the model? Take note AutoDesk. You may want to add a button for this one.
In the command prompt, type “CMFADECOLOR”. The default value is 60. Try setting this to 0.
Now, that’s a bit better. But lets try one more command to really get it to pop.
In the command prompt, type “CMFADEOPACITY”. The default value is 40. Try setting this to 0 as well. Viola!
I hope this helps you in your journeys to come. Let me know if this helped you.