19
Aug
2020
How Do You Utilize Scope Boxes for 3D Coordination?
BY Jason Matthews | 5 mins read
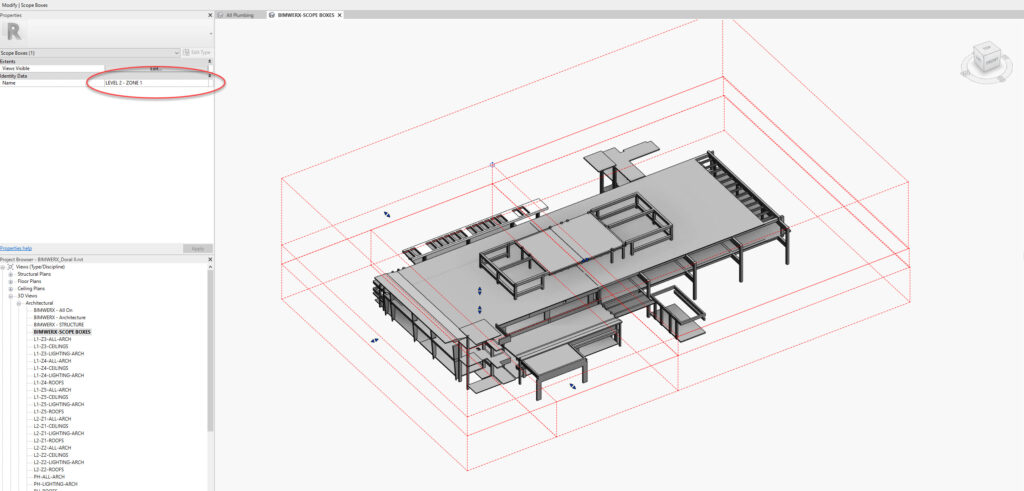
Most Revit users have at least heard of scope boxes and some have even implemented them on a design project. However, not many people have utilized scope boxes when doing BIM Coordination. You typically use scope boxes to define areas of a large project where you want to crop the view consistently over multiple views. For example, a project with a large footprint can employ scope boxes to ensure that the same extents are shown accurately on floor plans, finish plans, RCPs, and dimension plans. Scope boxes are created in plan view or RCP, but visible in all views and visible in other views if they intersect the view cut line. Scope boxes can be given names to easily identify them. There are a lot of really well documented sources on the web already, so we will skip over “All About Scope Boxes”.
So how can scope boxes be used for BIM Coordination? Since Revit 2019, scope boxes can be assigned to a 3D view which in turn can be exported to IFC or NWC for clash detection. Let’s walk through a typical BIM Coordinator’s workflow:
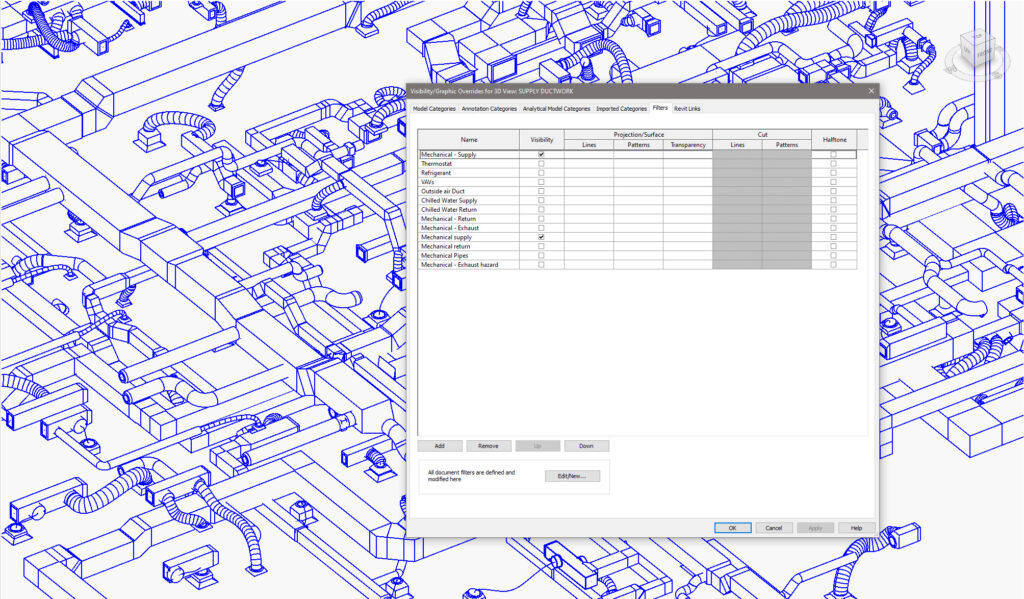
Step 1: Your subcontractors send you their models, not broken out by zone. It is encouraged that your subcontractors create 3D views based on their system (i.e. supply,return, chilled water, sanitary, etc.) so you can utilize their view filters in your model.

Step 2: Link all models into Revit (shared coordinates preferred), including those created in 3D CAD via generic model.
Step 3: Create a scope box for each zone in the project and be sure to name the scope box accordingly.

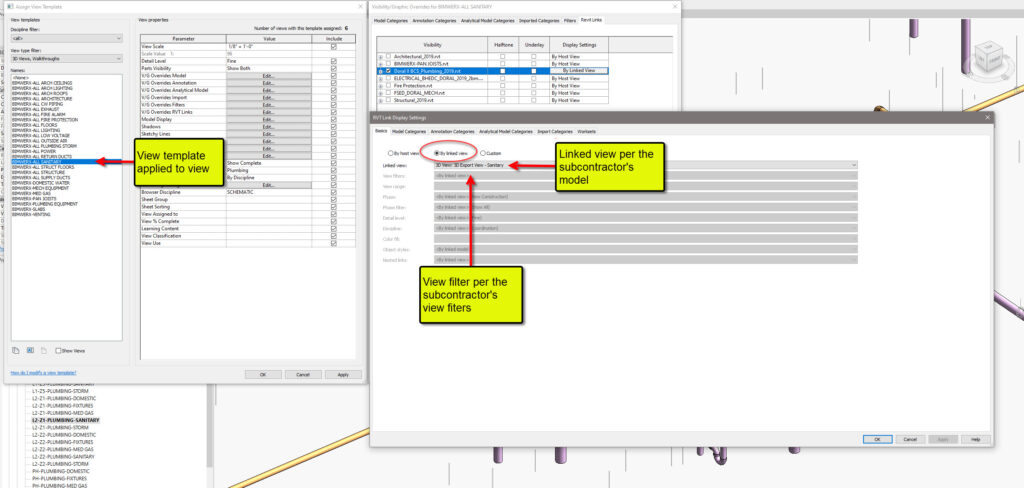
Step 4: Create individual 3D view templates for each trade and system and apply it to all 3D views you have created. Be sure to assign the correct scope box to the view template. Check that you are using the subcontractor’s 3D view and applicable filter in the view template.

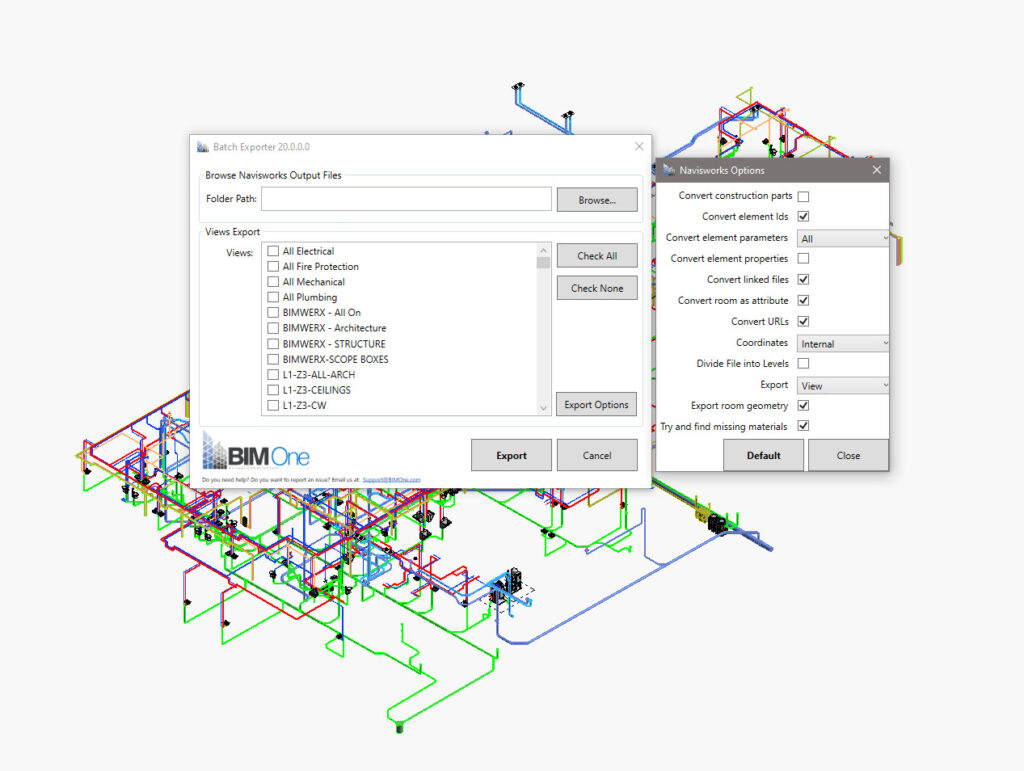
Step 5: Now you should have each subcontractor’s model split out by zone and system. In some cases, you could have multiple systems per zone, as mentioned in Step 1. If you have not already, visit our friends at www.bimone.com and download their add-in for Revit called NWC Batch Export.

Step 6: Select the appropriate export folder, options, and views you would like to export. Be sure to uncheck the box for “Export Room Geometry”, unless you want the Room volume to be exported for each space.
Step 7: Append your Navisworks model.
Hopefully this has given a little insight to how powerful scope boxes can be for getting your zones perfectly setup. Let us know your workflow. Do you use scope boxes? If you don’t do you think this workflow can help you?
